Configuring directory sync with Azure Active Directory
This article will cover how to connect the SecretSafe Directory Connector application to your Azure Active Directory.
Requirements
- Read through the following article: Syncing users and groups with a directory
- Install SecretSafe Directory Connector
- Using Directory Connector, log into your SecretSafe account and select your organization
Table of Contents
- Requirements
- Table of Contents
- Create a New Application Registration
- Grant Application Permissions
- Create Application Secret Key
- Get Your Application ID
- Get Your Tenant Hostname
- Configure Directory Connector
- Testing
Create a New Application Registration
- Go to https://portal.azure.com
- Select the Azure Active Directory resource
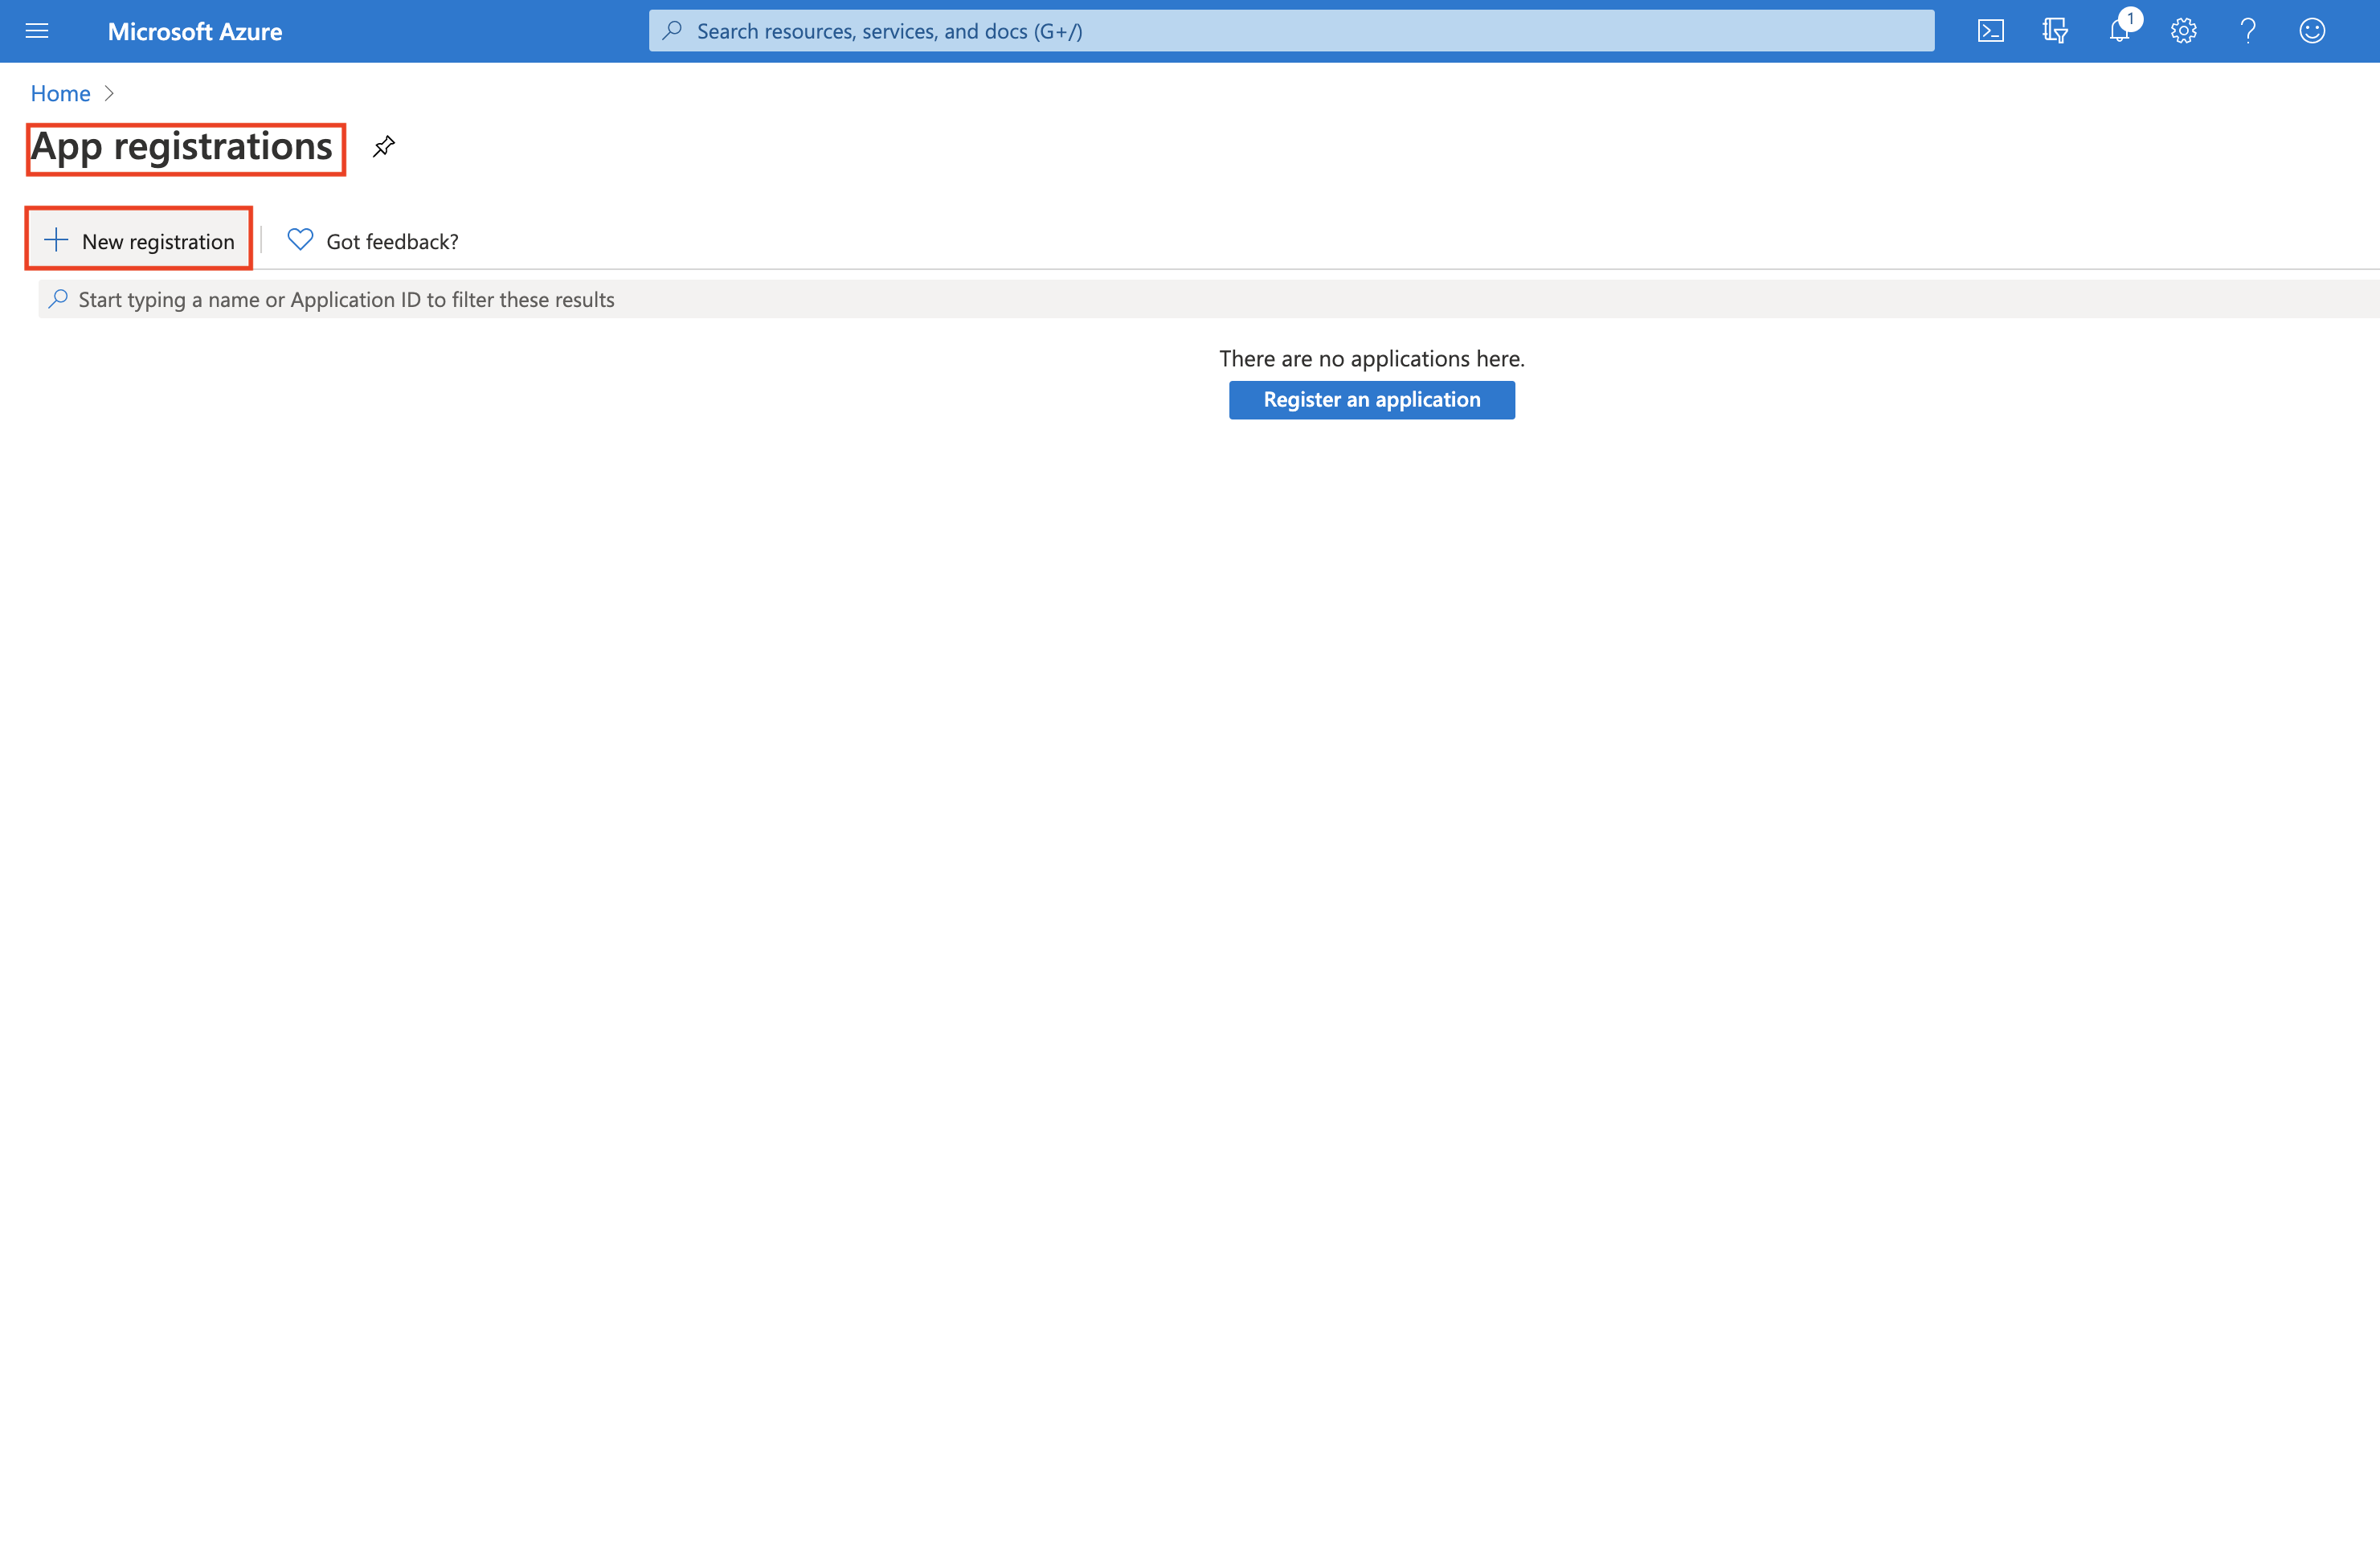
- Navigate to App registrations and select New registration
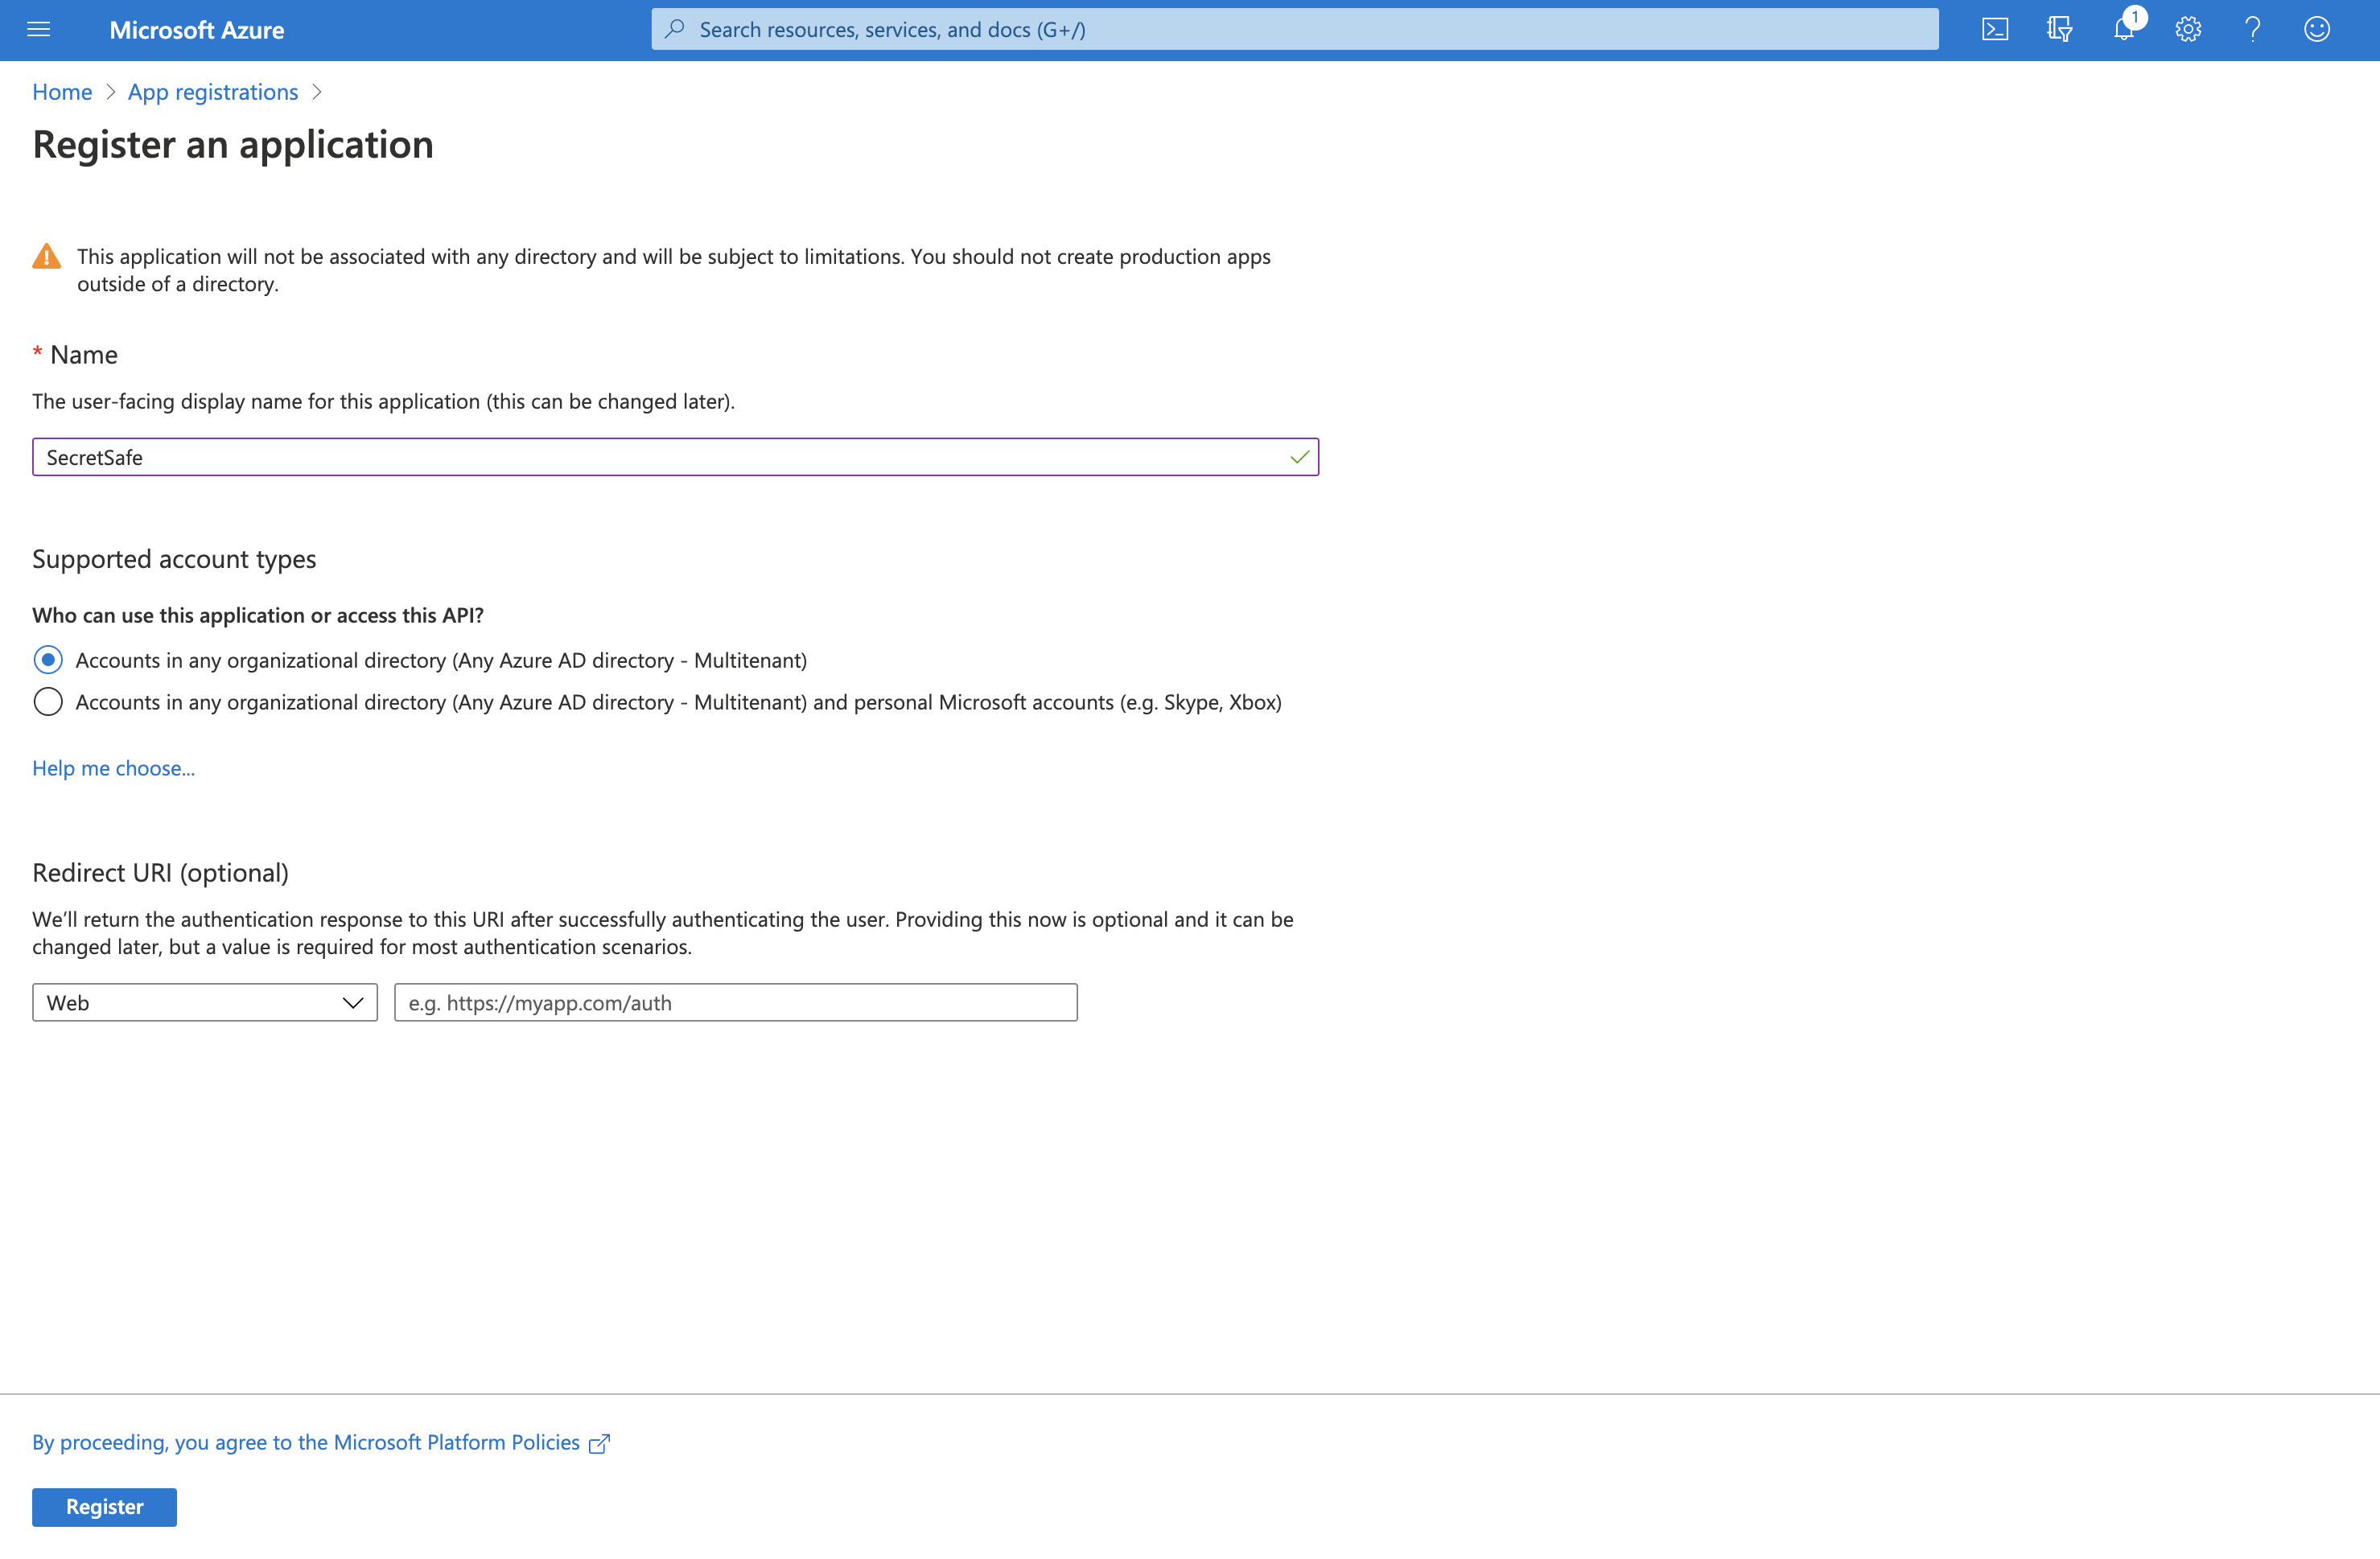
- Name your application "SecretSafe"
- Click the Create button to create the application.
Grant Application Permissions
- Select the SecretSafe application you created in the previous section.
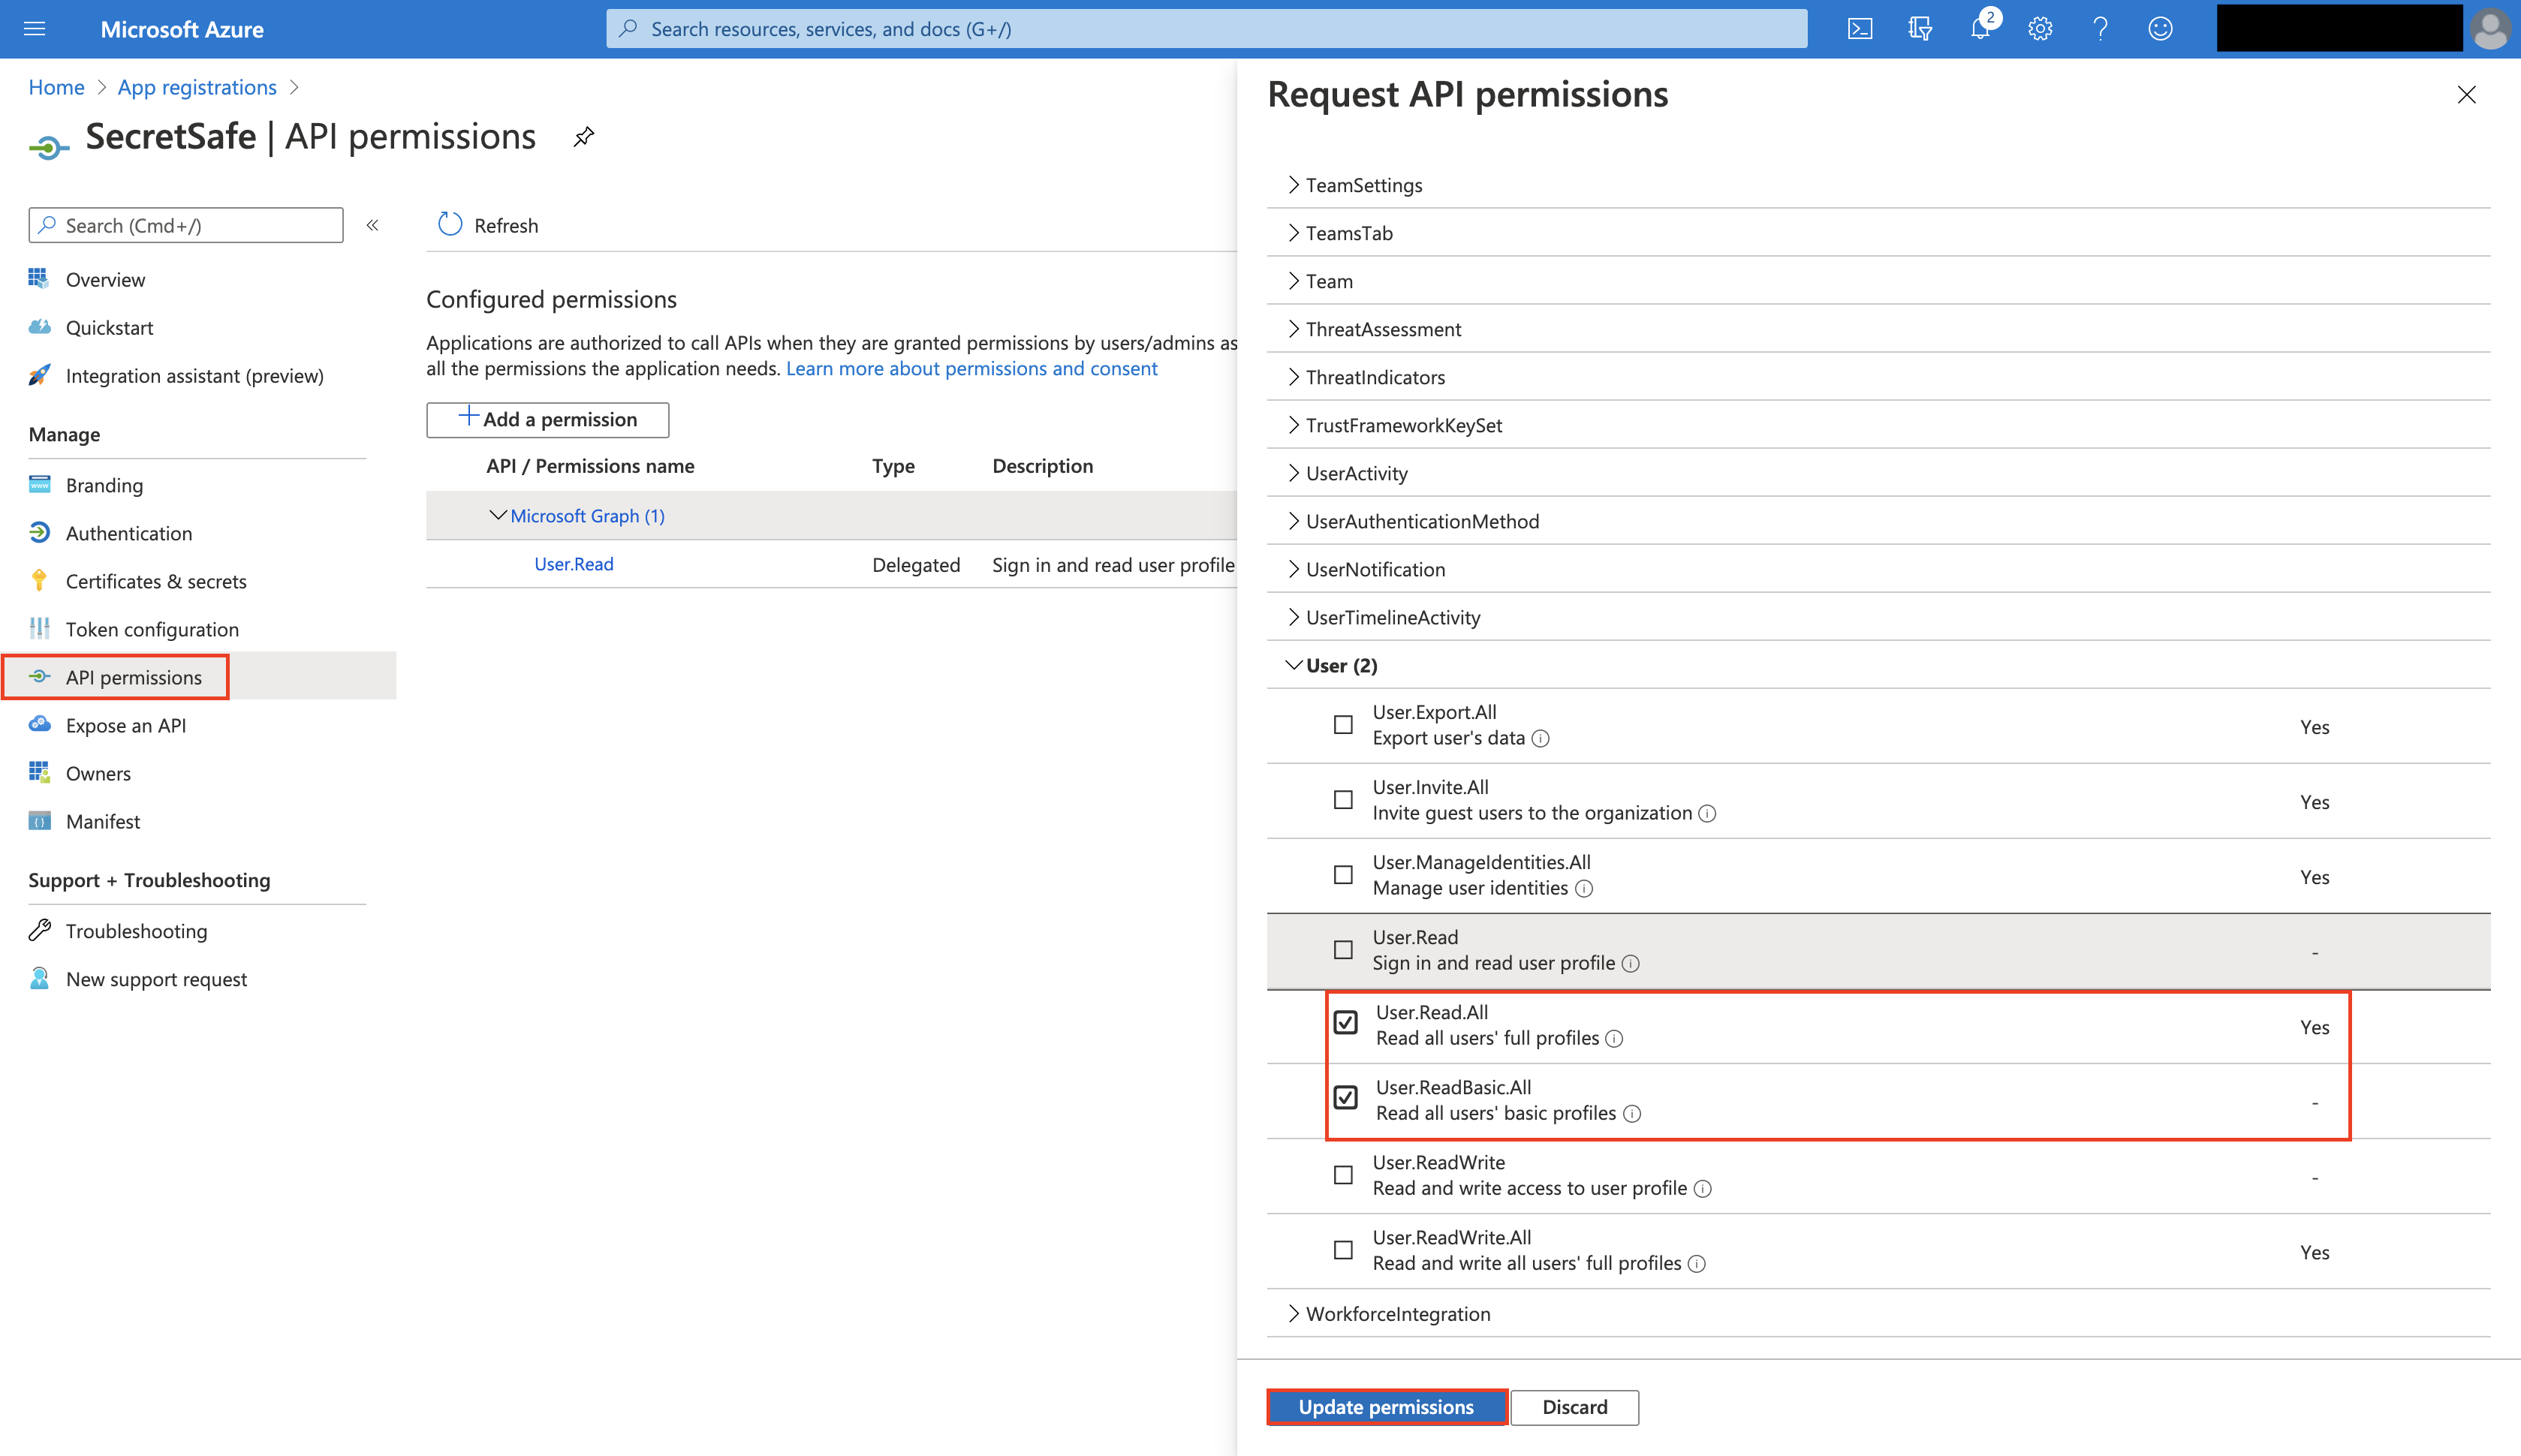
- Select API Permissions.
- Select the Add button to create a new API permission set.
- For step 1, Select an API for Microsoft Graph.
- For step 2, Select Permissions for the following:
- Application Permissions:
- "Read all users' full profiles"
- "Read all groups"
- Delegated Permissions:
- "Read all groups"
- "Read all users' full profiles"
- "Read all users basic profiles"
- Application Permissions:
- Click the Select button and then Done to add the Microsoft Graph API permissions.
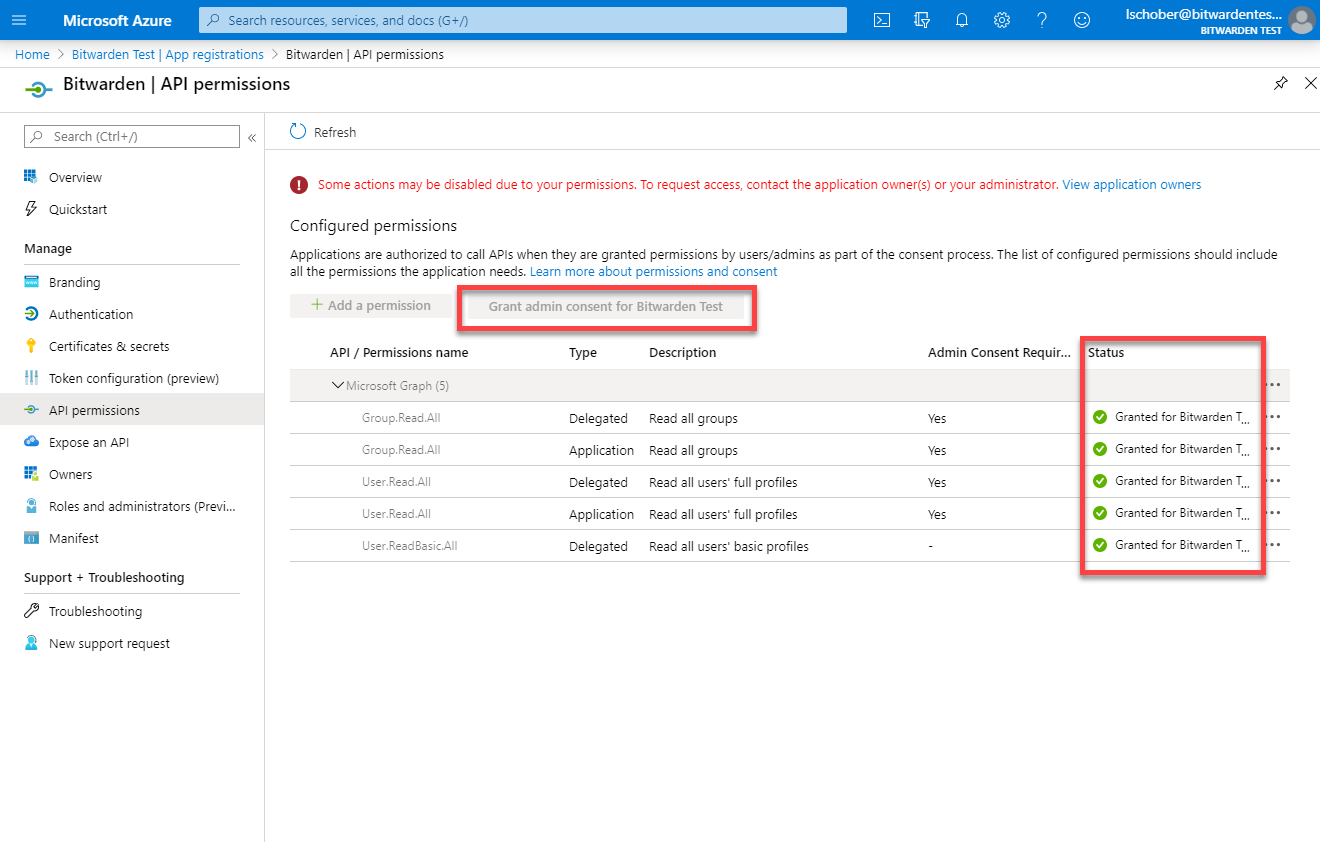
- Click the Grant Permissions button to grant the permissions to the application.
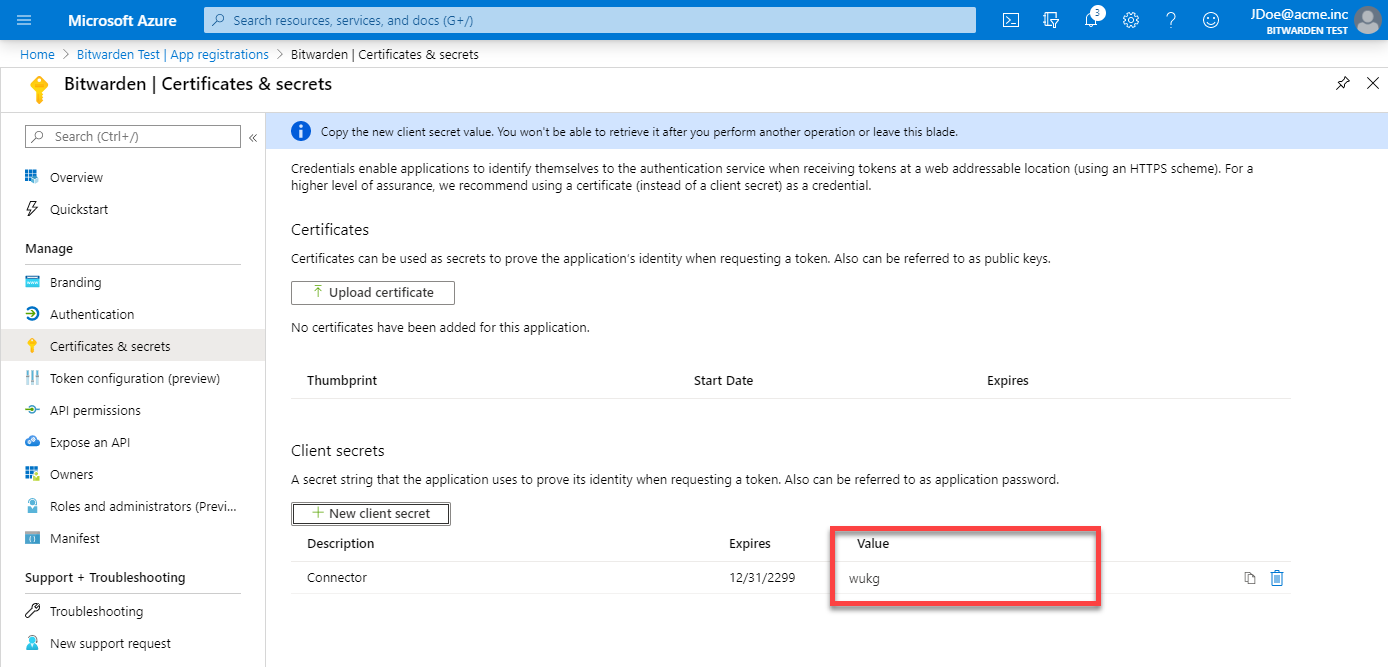
Create Application Secret Key
- Go back to the SecretSafe application that you created.
- Select Certificates & Keys.
- Add a new Password key by entering a Name and Duration. We recommend selecting "Never Expires" for the duration.
- Click Save to create a new secret key.
- Copy the key's value to safe place. We will need to reference it later.
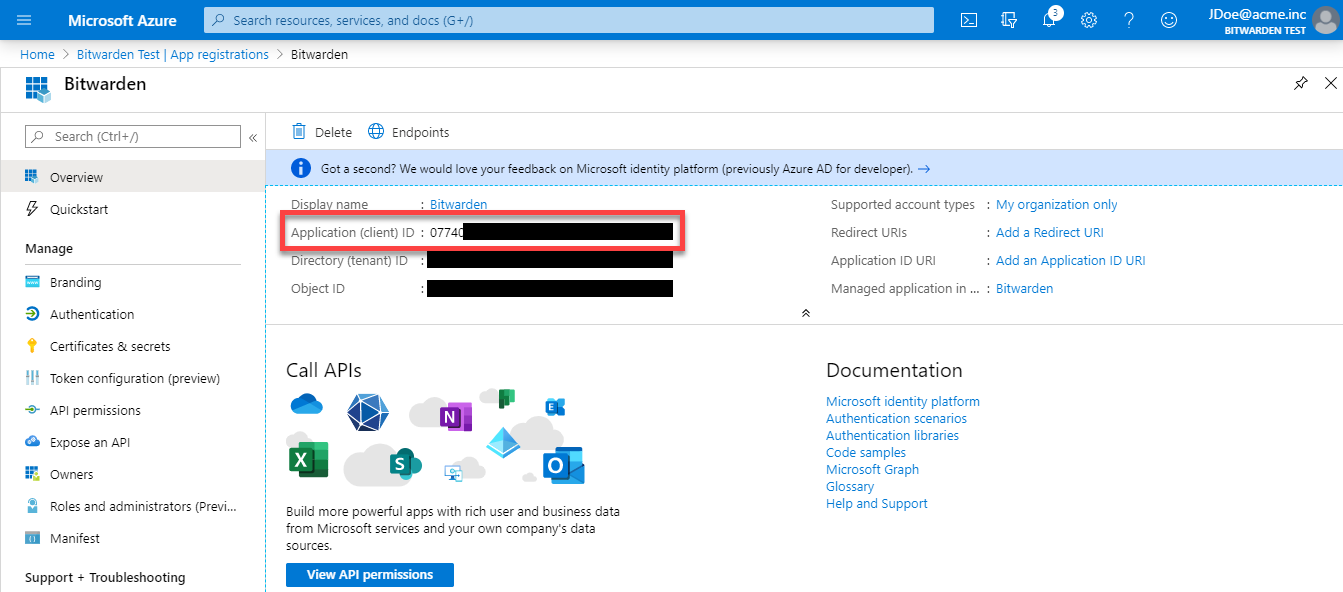
Get Your Application ID
- Go back to the SecretSafe application that you created.
- Copy the Application (client) ID to a safe place. We will need to reference it later.
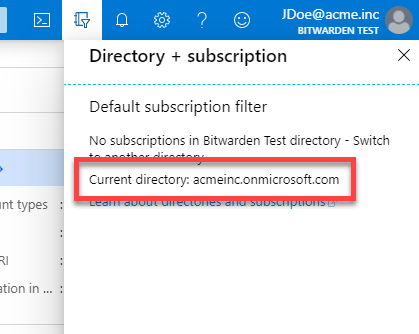
Get Your Tenant Hostname
- Select the Directory and Subscription filter in the top right corner of the Azure Portal.
- Note the Current directory (ex. acmeinc.onmicrosoft.com). This is your Tenant hostname. Copy the Tenant hostname to a safe place. We will need to reference it later.
Configure Directory Connector
- Launch the Directory Connector desktop application.
- Go to the Settings tab.
- Select Azure Active Directory as the directory type.
- Enter the Tenant hostname that you copied from the steps above (ex. company.onmicrosoft.com).
- Enter the Application ID that you copied from the steps above.
- Enter the Application Secret Key that you copied from the steps above.
Congrats! You are done configuring Azure Active Directory with the SecretSafe Directory Connector.
Testing
note
It can take up to 15 minutes for the granted permissions for your application to properly propagate. You may receive "Insufficient privileges to complete the operation" errors in the meantime.
Test your configuration by running a sync test. You should see your Azure Active Directory groups and/or users printed to the screen.